Several of the Yamaha motorcycle models, and the Kawasaki Mach III by Kozin, have spoked wheels. These are constructed using a cutout mesh of flat paper spokes. Despite the inevitably oversize width of these spokes, and the reduced number of spokes used to compensate, these are surprisingly effective.
I have, however, felt that properly spoked wheels using some sort of thread ought to look rather better, but have done nothing about it until recently. Two things stirred me out of my lethargy. Firstly, Eric Goedkoop posted an account of his method of constructing aeroplane wheels. Then, when I was working on the Kawasaki Mach III model I was not very happy with the wheels and tyres as drawn, and decided to recalculate and redraw them myself. It was thus only a small step to redrawing them for the correct pattern of "wire" spokes.
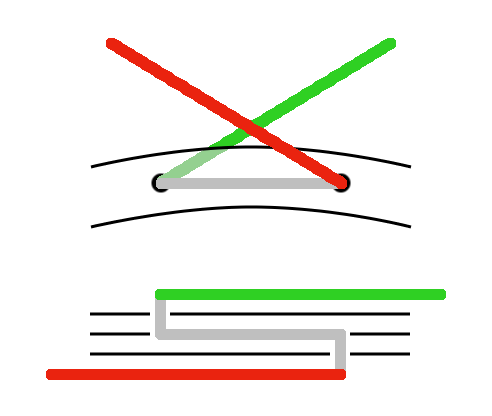
Eric developed his method for relatively small-sized wheels; the example in his account has a wheel rim 7/16in (11mm) in diameter. As a result, he gets excellent results with what is in truth only an approximation to an authentic spoke pattern. The most noticeable effect is that corresponding spokes from opposite ends of the hub meet the rim at the same point. In a full-size wheel the two sides are rotated slightly with respect to each other, so that all the spokes are spaced out equally at the rim, and spokes go alternately to the opposite ends of the hub. Less apparent is that with his technique all the spokes run across the outer face of the hub flange, while in full-size practice they alternate inside and outside.
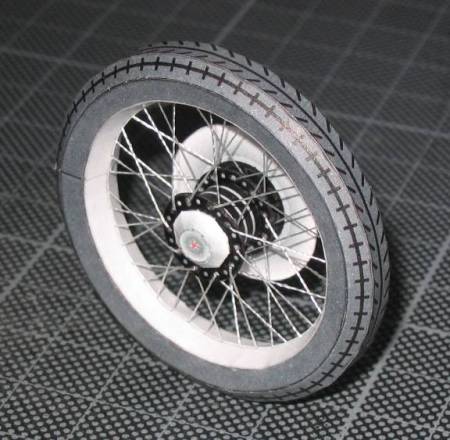
My half-size Kawasaki rims were quite a lot larger, somewhat over 30mm. This made me want to reproduce full-size practice more closely, as the spoke pattern would be much more apparent in this size.
The major change to the method is that I made the hub flange from three layers of paper, and drilled holes to allow the spoke threads to pass through.
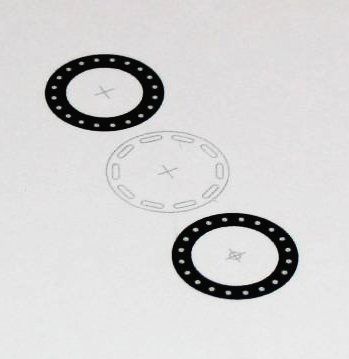
Each of the outer layers has ten holes drilled near the edge. The printed parts have twenty spots: alternate spots are drilled, and the remaining ones left blank, to represent the riveted-over end of a spoke passing through from the other side. The middle layer has ten slots, each linking the positions of two adjacent spots on the outer layers. Each layer also has a central hole to allow them to be threaded on a pin for alignment. All three parts are strengthened with cyanoacrylate before drilling the holes and cutting out.
After drilling and cutting, the middle piece is glued to one of the outer ones so that the holes in the outer line up with one end of each slot in the middle. Then all three pieces are threaded on a pin, and lengths of thread run through each pair of holes. The best-looking thread would probably be silver coloured nylon monofilament, but I had none to hand, so used twisted sewing thread instead. The twist is visible, but not too offensive, in the finished product.
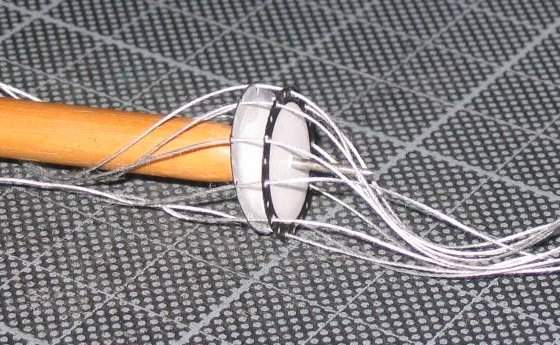
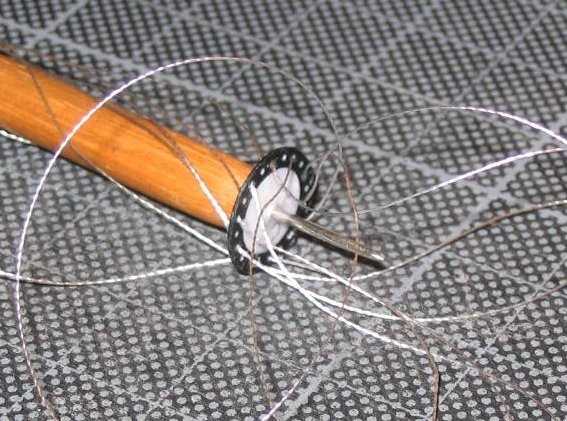
Note that this photograph is of an earlier attempt (for a
different wheel), when I did not use a middle spacing piece.
Finally the two parts of the flange are glued together, ensuring that the holes in each outer part line up with the blank "rivet ends" on the other, trapping the threads in the slots of the middle layer.
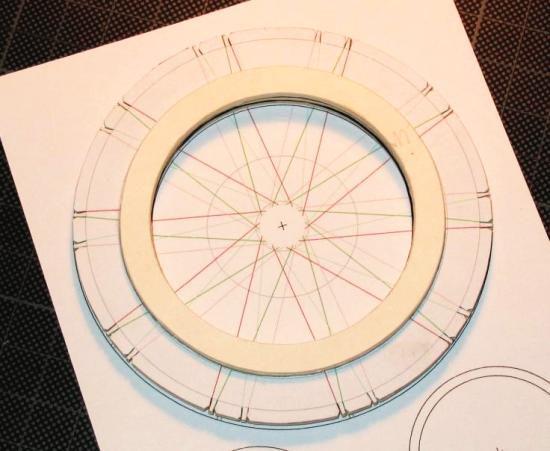
To lace up the spokes, I use a jig almost identical to Eric's, except that in order to position the spokes precisely there is a slot on the outer edge for each spoke, whereas his slots serve for two pairs of spokes each. I drew out the full pattern with the four different sets of spokes (inner and outer, near and far flange) in different colours, and printed it twice. One copy is used to make the jig, and one for a backing sheet to help centre the hub, and show the run of the spokes across the hole in the jig.
One hub flange is glued to the hub barrel, and placed in the centre of the jig, flange up. The threads are then passed in turn under the jig, and pulled into their locating slots with a little tension. Two opposite pairs are done first, and adjusted to locate the hub in the centre. Then more pairs are laced up, making sure to get the right over-under pattern, and adjusting tensions to keep things aligned. The fact that the hub and jig are the same thickness means that the hub will be centred on the plane of the wheel just by ensuring that both hub and jig are held down firmly to the work surface. Once all the spokes are laced, the whole thing can be turned over, and the second hub flange glued on, making sure that it is rotated so that its holes come between those of the other side. Finally all of this hub's spokes are laced up.
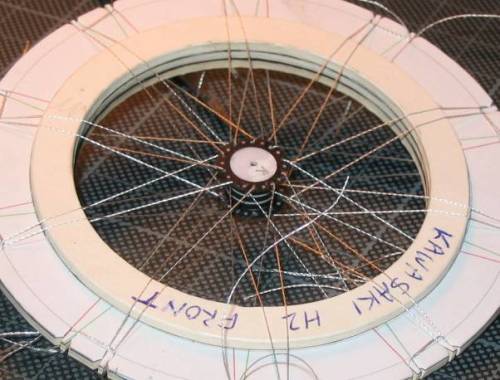
Next comes the rim, which is made up of two truncated cones of paper, in the Yamaha style. One has exactly 40 tabs around its edge, to fit between and position accurately the 40 spokes. Once the rim is in place, a bead of epoxy locks all the spokes in place.

Once the epoxy has hardened, the wheel can be cut away from the jig, and the spokes trimmed. The tyre and hubs can then be finished in the usual way.